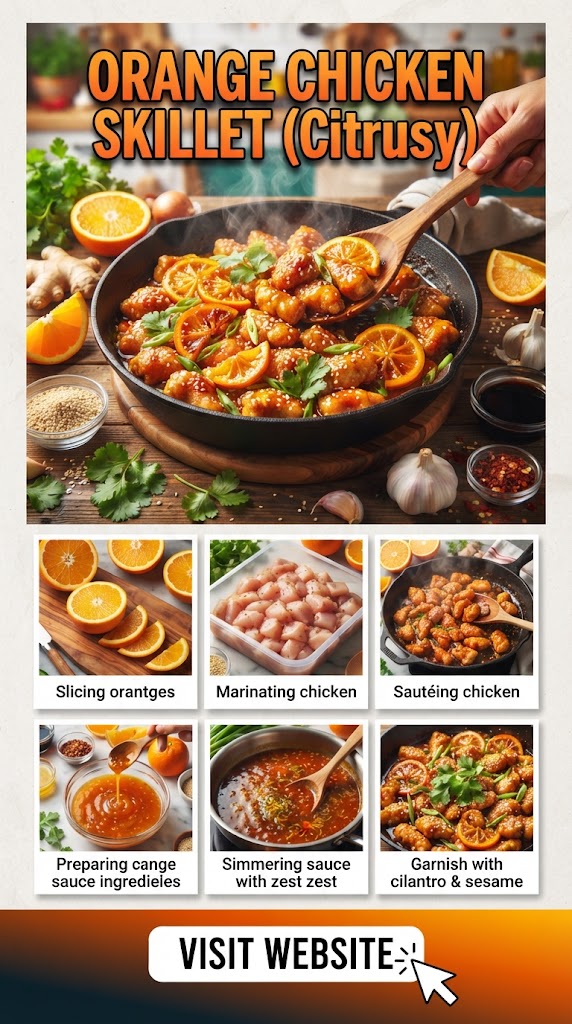

Honey Garlic Chicken Skillet
Honey Garlic Chicken Skillet
Honey Garlic Chicken Skillet is the kind of dinner that makes a busy evening feel easy. Tender pieces of golden-brown chicken are coated in a glossy sauce made with honey, fresh garlic, soy sauce, and a few simple pantry ingredients. The result is sweet, savory, garlicky, slightly tangy, and incredibly satisfying.
This one-pan chicken recipe is especially useful when you want a homemade dinner without spending hours in the kitchen. Everything comes together in one skillet, which means less preparation, fewer dishes, and plenty of flavor. Serve it with steamed rice, roasted vegetables, noodles, or a simple green salad for a complete meal.
Why You’ll Love This Honey Garlic Chicken Skillet
There are plenty of reasons this recipe deserves a regular place in your dinner rotation.
It uses simple ingredients. Most of what you need is probably already in your pantry or refrigerator.
It cooks in one skillet. The chicken and sauce come together in the same pan, making cleanup much easier.
It is fast. Once your ingredients are prepared, the entire meal can be ready in roughly 30 minutes.
The sauce is incredibly flavorful. Honey provides sweetness, soy sauce contributes salty umami flavor, garlic adds aromatic depth, and vinegar or lemon juice keeps the sauce balanced.
It is versatile. You can add vegetables, change the protein, adjust the spice level, or serve it with different side dishes.
It is family-friendly. The basic recipe is flavorful without being overly spicy, while red pepper flakes or hot sauce can be added for those who enjoy heat.
Complete Honey Garlic Chicken Skillet Recipe
Recipe at a Glance
Prep Time: 10–15 minutes
Cook Time: 15–20 minutes
Total Time: About 30–35 minutes
Servings: 4
Course: Dinner
Cuisine: American-inspired Asian-style
Cooking Method: Stovetop skillet
Difficulty: Easy
Ingredients
For the Chicken
- 1 ½ pounds boneless, skinless chicken breasts
- 1 tablespoon olive oil
- 1 tablespoon unsalted butter
- ½ teaspoon salt
- ½ teaspoon black pepper
- ½ teaspoon paprika
- ¼ teaspoon onion powder
- ¼ teaspoon garlic powder
For the Honey Garlic Sauce
- ⅓ cup honey
- ¼ cup low-sodium soy sauce
- 5–6 cloves fresh garlic, finely minced
- 1 tablespoon apple cider vinegar or rice vinegar
- 1 tablespoon water
- 1 teaspoon freshly grated ginger
- ½ teaspoon sesame oil
- ½ teaspoon red pepper flakes, optional
For Thickening the Sauce
- 1 tablespoon cornstarch
- 2 tablespoons cold water
Optional Garnishes
- 1 tablespoon toasted sesame seeds
- 2 green onions, thinly sliced
- Fresh parsley or cilantro
- Thinly sliced red chili
- A small squeeze of fresh lime juice
How to Make Honey Garlic Chicken Skillet
Step 1: Prepare the Chicken
Start by trimming the chicken breasts and removing any excess fat or tough connective tissue.
Cut the chicken into bite-sized pieces, approximately 1 to 1½ inches each.
Try to keep the pieces relatively similar in size. This is important because evenly sized chicken pieces cook at approximately the same rate.
Place the chicken pieces in a bowl and season them with salt, black pepper, paprika, onion powder, and garlic powder.
Toss everything together until the seasoning coats the chicken evenly.
Let the seasoned chicken sit for a few minutes while you prepare the sauce.
Why Cut the Chicken Into Pieces?
Chicken breast can sometimes become dry when cooked for too long. Cutting it into relatively small, uniform pieces allows it to brown quickly and cook efficiently.
It also means every bite can become coated in the honey garlic sauce.
Step 2: Make the Honey Garlic Sauce
Before turning on the stove, prepare the sauce.
In a medium bowl, combine:
- Honey
- Soy sauce
- Minced garlic
- Apple cider vinegar or rice vinegar
- Water
- Fresh ginger
- Sesame oil
- Red pepper flakes, if using
Whisk until well combined.
Taste a tiny amount before adding it to the pan.
If you prefer a sweeter sauce, add a little more honey.
If you want more savory flavor, add a small amount of soy sauce.
For extra tanginess, add another teaspoon of vinegar.
For more heat, increase the red pepper flakes.
Important Tip
Fresh garlic makes a noticeable difference in this recipe. Jarred minced garlic can work when necessary, but freshly minced garlic gives the sauce a much brighter aroma and flavor.
Step 3: Prepare the Cornstarch Slurry
In a small bowl, whisk together 1 tablespoon cornstarch and 2 tablespoons cold water.
Mix until completely smooth.
This mixture is called a cornstarch slurry and will help thicken the sauce.
Do not add dry cornstarch directly to the hot sauce because it can form lumps.
Keep the slurry nearby until you are ready to thicken the sauce.
Step 4: Heat the Skillet
Place a large skillet over medium-high heat.
A heavy-bottomed skillet works especially well because it distributes heat evenly.
Add the olive oil and butter.
Allow the butter to melt, but don’t let it become dark brown.
The skillet should be hot enough that the chicken begins sizzling immediately when it touches the surface.
Step 5: Brown the Chicken
Carefully add the seasoned chicken pieces to the hot skillet.
Arrange them in a single layer as much as possible.
Avoid immediately moving the chicken around.
Let it cook undisturbed for approximately 2–3 minutes.
This gives the surface time to develop a golden-brown crust.
Then turn the chicken pieces and continue cooking for another 2–3 minutes.
If your skillet is crowded, cook the chicken in two batches.
Why Avoid Overcrowding?
When too many pieces of chicken are placed in the pan at once, they release moisture. Instead of browning, they can begin steaming.
For the best flavor, give the chicken enough space to make direct contact with the hot skillet.
Step 6: Check the Chicken
Continue cooking until the chicken is golden on the outside and cooked through.
The safest way to determine whether chicken is fully cooked is to check its internal temperature with an instant-read thermometer.
Chicken should reach 165°F (74°C) in the thickest part.
Once cooked, transfer the chicken to a clean plate.
Don’t worry if the skillet has browned bits remaining on the bottom.
Those flavorful bits will become part of the sauce.
Step 7: Add the Honey Garlic Sauce
Reduce the heat to medium.
Pour the prepared honey garlic sauce into the skillet.
Use a wooden spoon or spatula to scrape the browned bits from the bottom of the pan.
Allow the sauce to simmer gently for approximately 1–2 minutes.
The garlic will become fragrant and the honey will begin creating a glossy consistency.
Be careful not to use extremely high heat because honey contains natural sugars and can burn relatively quickly.
Step 8: Thicken the Sauce
Give your cornstarch slurry another quick stir because the cornstarch may have settled.
Pour it gradually into the simmering sauce while stirring continuously.
Continue cooking for approximately 1–2 minutes.
The sauce should become thicker, shiny, and able to coat the back of a spoon.
If the sauce becomes too thick, add 1–2 tablespoons of water.
If it is too thin, allow it to simmer for another minute or add a very small amount of additional cornstarch slurry.
Step 9: Return the Chicken to the Skillet
Place the cooked chicken back into the skillet.
Toss the pieces gently in the sauce.
Continue cooking for approximately 1–2 minutes.
The goal is to coat every piece of chicken with the glossy honey garlic sauce.
At this point, the kitchen should smell intensely garlicky, sweet, savory, and delicious.
Step 10: Finish and Garnish
Turn off the heat.
Sprinkle the chicken with toasted sesame seeds and sliced green onions.
For a fresh finish, add a small squeeze of lime juice.
You can also add sliced red chili, chopped cilantro, or fresh parsley.
Serve immediately while the sauce is warm and glossy.
What Does Honey Garlic Chicken Taste Like?
The flavor of this skillet chicken comes from balancing several contrasting ingredients.
Honey provides sweetness and creates the beautiful glossy finish.
Soy sauce supplies saltiness and deep savory flavor.
Garlic gives the dish its signature aroma and sharpness.
Ginger adds warmth and a subtle citrus-like freshness.
Vinegar provides acidity that prevents the sauce from becoming overly sweet.
Sesame oil adds a nutty aroma.
Red pepper flakes contribute optional heat.
The result isn’t simply sweet chicken. Instead, the sauce combines sweet, salty, savory, tangy, garlicky, and slightly spicy notes.
Best Chicken to Use
Boneless, skinless chicken breasts are convenient and lean, making them an excellent choice for this recipe.
However, boneless, skinless chicken thighs are also excellent.
Chicken Breast
Chicken breast has a mild flavor and lean texture.
Because it contains less fat, avoid overcooking it.
Chicken Thighs
Chicken thighs are naturally more forgiving and tend to remain juicy.
They also have a slightly richer flavor.
Chicken Tenderloins
Chicken tenderloins cook quickly and require little preparation.
Cut them into smaller pieces if necessary so they cook evenly.
How to Prevent Dry Chicken
One of the biggest mistakes people make with skillet chicken is overcooking it.
Here are several ways to keep your chicken tender.
Cut Pieces Evenly
Uniform pieces cook at the same rate.
Use Medium-High Heat for Browning
A hot skillet helps develop color quickly without requiring a long cooking time.
Don’t Overcrowd the Pan
Overcrowding can cause steaming and uneven cooking.
Use a Thermometer
Instead of cutting every piece open to check it, use a thermometer and remove the chicken once it reaches a safe internal temperature.
Don’t Simmer the Chicken for Too Long
Once the sauce is thickened, return the chicken and coat it briefly.
Vegetable Additions
This recipe is delicious on its own, but vegetables can easily turn it into a complete one-pan meal.
Broccoli
Add small broccoli florets to the skillet after the chicken is browned.
You may need to add a splash of water and cover the skillet briefly to soften the broccoli.
Bell Peppers
Sliced red, yellow, or green bell peppers add color and a mild sweetness.
Cook them until slightly tender but still crisp.
Snow Peas
Snow peas cook quickly and add a fresh crunch.
Add them near the end so they don’t become overly soft.
Green Beans
Green beans provide texture and pair beautifully with the sweet garlic sauce.
Carrots
Thinly sliced carrots add natural sweetness.
Because carrots take longer to cook, slice them thinly or partially cook them before adding them to the skillet.
Mushrooms
Sliced mushrooms absorb the sauce beautifully and add an earthy flavor.
Cook them until their moisture evaporates and they develop some golden color.
How to Make It Spicy
For a spicy version, increase the red pepper flakes.
You can also add:
- Sriracha
- Chili garlic sauce
- Fresh sliced jalapeños
- Crushed red pepper
- Cayenne pepper
Start with a small amount and increase gradually.
Remember that the honey balances heat, so you can create a surprisingly spicy sauce without making the dish unpleasantly harsh.
How to Make the Sauce Extra Sticky
If you want a thicker, restaurant-style coating, use the cornstarch slurry as described above.
The key is to let the sauce simmer gently after adding the slurry.
Don’t immediately turn off the heat.
The cornstarch needs heat to activate and thicken the sauce.
However, avoid boiling it aggressively for a long time because the sauce may become too thick.
What to Serve With Honey Garlic Chicken
This chicken pairs with many different sides.
Steamed Rice
White rice is one of the easiest choices.
The mild flavor allows the sauce to take center stage.
Brown Rice
Brown rice adds a nuttier flavor and more texture.
Jasmine Rice
Jasmine rice is especially good because its fragrant aroma complements the honey garlic sauce.
Noodles
Serve the chicken over cooked noodles for a comforting meal.
Rice noodles, egg noodles, or spaghetti can all work.
Cauliflower Rice
For a lighter option, serve the chicken with cauliflower rice.
Roasted Vegetables
Roasted broccoli, carrots, Brussels sprouts, or green beans make excellent sides.
Simple Salad
A crisp green salad provides freshness and contrast to the rich sauce.
Recipe Variations
Honey Garlic Chicken and Broccoli
Add 3 cups of broccoli florets to create a classic chicken-and-broccoli skillet.
Lemon Honey Garlic Chicken
Replace part of the vinegar with fresh lemon juice and add a little lemon zest.
Spicy Honey Garlic Chicken
Increase red pepper flakes and add a teaspoon of chili sauce.
Honey Garlic Chicken Thighs
Use boneless chicken thighs instead of chicken breast.
The result will be richer and especially juicy.
Ginger Honey Garlic Chicken
Increase the fresh ginger for a stronger aromatic flavor.
Sesame Honey Garlic Chicken
Add additional toasted sesame seeds and a drizzle of sesame oil before serving.
Common Mistakes to Avoid
Adding Cold Chicken to a Lukewarm Pan
The chicken may release too much moisture and fail to brown properly.
Burning the Garlic
Garlic can burn quickly, especially over high heat.
Keep the sauce at a gentle simmer.
Making the Sauce Too Sweet
Honey is powerful. Start with the recommended amount and adjust after tasting.
Skipping the Acid
Vinegar or lemon juice is important because it balances the sweetness.
Using Too Much Cornstarch
Too much can create a thick, gummy sauce.
Start with the recommended slurry.
Overcooking the Chicken
Use an instant-read thermometer whenever possible.
Overcrowding the Skillet
Cook in batches if necessary.
Storage Instructions
Allow leftovers to cool and transfer them to an airtight container.
Refrigerate promptly.
For best quality, use refrigerated leftovers within several days.
The sauce may become thicker when chilled.
When reheating, add a small splash of water or chicken broth to loosen the sauce.
Warm gently in a skillet over medium-low heat, stirring occasionally.
You can also reheat individual portions in the microwave, using short intervals and stirring between them.
Avoid overheating because chicken can become dry and tough.
Can You Freeze Honey Garlic Chicken?
Yes, the cooked chicken can be frozen.
Place cooled chicken and sauce in a freezer-safe container.
Leave a little room for expansion.
Thaw it safely in the refrigerator before reheating.
Because sauces containing cornstarch can sometimes change texture after freezing and thawing, the sauce may not be quite as silky as when freshly prepared.
If the sauce separates slightly, gently reheat it and stir thoroughly.
Meal Prep Tips
Honey Garlic Chicken Skillet can work well as a meal-prep dinner.
Prepare the chicken and sauce as directed, then divide it into individual containers.
Pair each serving with rice and vegetables.
For best texture, keep crunchy garnishes such as green onions and sesame seeds separate until serving.
You can prepare several portions at once and reheat them throughout the week.
Frequently Asked Questions
Can I use chicken thighs?
Absolutely. Boneless, skinless chicken thighs are an excellent substitute and are often even juicier than chicken breast.
Can I make this without cornstarch?
Yes. Simply simmer the sauce longer until it reduces naturally.
The resulting sauce will be somewhat different but still flavorful.
Can I use maple syrup instead of honey?
Yes. Maple syrup can replace honey, although it will give the sauce a slightly different flavor.
Can I use garlic powder instead of fresh garlic?
Fresh garlic is recommended, but garlic powder can work in a pinch. The flavor will be less pronounced and aromatic.
Can I make this gluten-free?
Use a gluten-free soy sauce or tamari and verify that your other ingredients are certified gluten-free if necessary.
Can I add vegetables?
Definitely. Broccoli, peppers, green beans, carrots, mushrooms, and snow peas are all excellent choices.
How do I know when the chicken is done?
The most reliable method is checking the thickest part with an instant-read thermometer. Chicken should reach 165°F (74°C).
Why is my sauce too thin?
Let it simmer a little longer. If necessary, add a small amount of cornstarch slurry.
Why did my sauce become too thick?
Add a tablespoon or two of water or chicken broth and stir over low heat until the desired consistency returns.
Tips for the Best Honey Garlic Chicken Skillet
For the most flavorful result, remember these simple principles:
- Use fresh garlic whenever possible.
- Cut chicken into evenly sized pieces.
- Preheat your skillet properly.
- Don’t overcrowd the pan.
- Brown the chicken before adding the sauce.
- Keep the honey sauce at a gentle simmer.
- Balance sweetness with vinegar or lemon juice.
- Use a cornstarch slurry for a glossy, thick sauce.
- Don’t overcook the chicken.
- Garnish immediately before serving.
Complete Recipe Card
Honey Garlic Chicken Skillet
Yield: 4 servings
Prep: 10–15 minutes
Cook: 15–20 minutes
Total: About 30–35 minutes
Ingredients
Chicken:
- 1 ½ pounds boneless, skinless chicken breasts
- 1 tablespoon olive oil
- 1 tablespoon unsalted butter
- ½ teaspoon salt
- ½ teaspoon black pepper
- ½ teaspoon paprika
- ¼ teaspoon onion powder
- ¼ teaspoon garlic powder
Sauce:
- ⅓ cup honey
- ¼ cup low-sodium soy sauce
- 5–6 cloves fresh garlic, minced
- 1 tablespoon apple cider vinegar or rice vinegar
- 1 tablespoon water
- 1 teaspoon fresh grated ginger
- ½ teaspoon sesame oil
- ½ teaspoon red pepper flakes, optional
Thickener:
- 1 tablespoon cornstarch
- 2 tablespoons cold water
Garnish:
- Toasted sesame seeds
- Sliced green onions
- Fresh lime juice, optional
Instructions
- Cut the chicken into evenly sized bite-sized pieces.
- Season chicken with salt, pepper, paprika, onion powder, and garlic powder.
- Whisk honey, soy sauce, garlic, vinegar, water, ginger, sesame oil, and red pepper flakes in a bowl.
- Mix cornstarch with cold water in a separate bowl to make a slurry.
- Heat olive oil and butter in a large skillet over medium-high heat.
- Add chicken in a single layer and cook until golden brown, turning occasionally.
- Check that the chicken reaches 165°F (74°C).
- Remove chicken and temporarily set aside.
- Reduce heat to medium and pour the honey garlic sauce into the skillet.
- Scrape the browned bits from the bottom of the pan.
- Simmer for 1–2 minutes.
- Stir the cornstarch slurry and gradually add it to the sauce.
- Cook until the sauce becomes glossy and thickened.
- Return the chicken to the skillet.
- Toss until every piece is coated.
- Cook for another 1–2 minutes.
- Turn off the heat.
- Garnish with sesame seeds and green onions.
- Add a small squeeze of lime juice if desired.
- Serve immediately with rice, noodles, or vegetables.
Final Thoughts
Honey Garlic Chicken Skillet proves that an impressive dinner doesn’t need a long ingredient list or complicated cooking technique. With tender chicken, fragrant garlic, sweet honey, savory soy sauce, and a touch of acidity, the sauce delivers a satisfying combination of flavors in every bite.
The skillet method is particularly convenient because the chicken is browned first, creating flavorful bits in the pan that become part of the sauce. Once the sauce thickens, the chicken is returned to the skillet so every piece becomes coated in the glossy honey garlic mixture.
For a quick weeknight dinner, serve it over steamed jasmine rice with broccoli. For a lighter meal, pair it with cauliflower rice and a crisp salad. If you’re feeding people who enjoy spicy food, add red pepper flakes or chili sauce. And if you’re preparing meals ahead of time, portion the chicken with rice and vegetables for convenient lunches or dinners.
The best part is how adaptable the recipe is. You can use chicken breast or thighs, add your favorite vegetables, adjust the sweetness, increase the garlic, or introduce as much heat as your family enjoys.
Once you make it, this simple Honey Garlic Chicken Skillet may become one of those reliable recipes you return to whenever you need a fast, flavorful, homemade dinner.